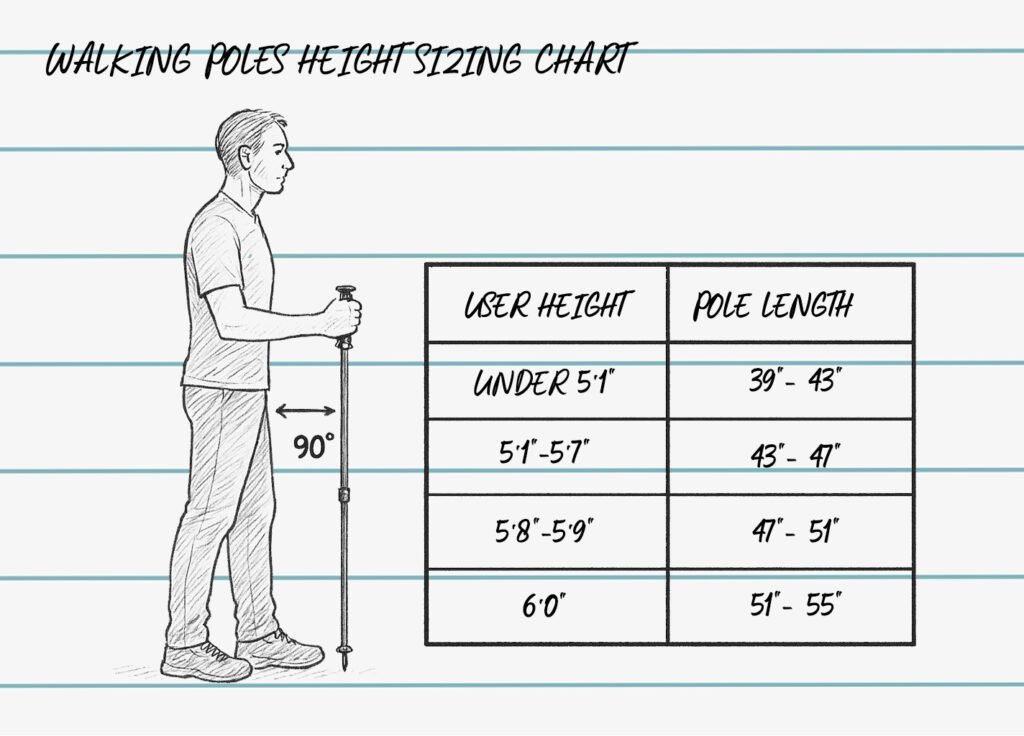
For most hikers, the best pole length is your height in centimeters multiplied by 0.66 — so if you’re 170 cm (about 5’7″), you’ll want poles around 112 cm. Set them so your elbow bends at roughly 90 degrees when you hold the grip with the tip on the ground. On steep downhill stretches, lengthen them a few centimeters; on steep climbs, shorten them by the same amount.
Why sizing matters before you buy
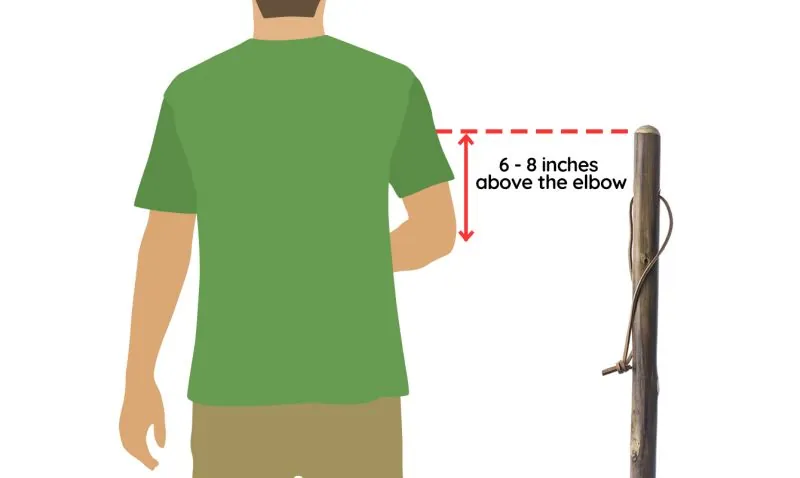
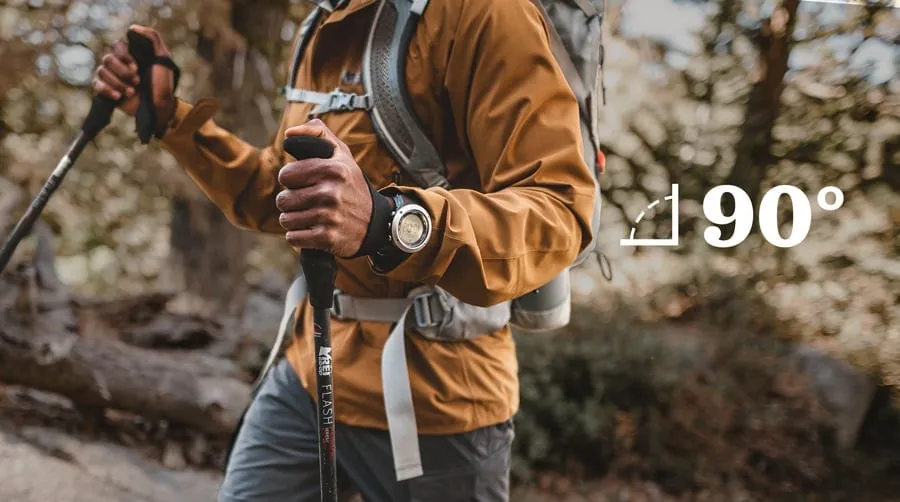
The one thing that decides whether poles help or hurt is elbow angle. When your forearm sits level and your elbow bends at about 90 degrees, your shoulders stay relaxed and the poles actually take weight off your knees. When the poles are too long, your shoulders ride up and your wrists bend awkwardly; too short, and you hunch forward with every step.
The most common mistake happens before the first step: people buy fixed-length poles because they’re cheaper, without checking the size range printed on them. Fixed poles come in blocks — often 100, 110, 120, 130 cm — and if your height falls between blocks, you’re stuck.
If your height in cm × 0.66 lands within 2–3 cm of a fixed size, buy fixed and save the money; if it falls between sizes, pay a little more for adjustable poles so you can fine-tune for uphill and downhill.
How to set your pole length
Setting the length takes five minutes and no tools beyond the markings already printed on the poles. Do it standing up in shoes with the soles you actually hike in, on a flat floor.
- Measure your height. Stand straight against a wall without shoes and note your height in centimeters. If you only know feet and inches, multiply total inches by 2.54 to get centimeters.
- Multiply by 0.66. A 165 cm hiker gets about 109 cm, so round to 110. A 180 cm hiker gets about 119, so round to 120. Rounding to the nearest 5 cm is fine — the elbow check in the next step settles it.
- Unlock and extend the poles. Flip the lever or twist the lock, pull each section out to your target length, and set both poles to exactly the same number.
- Do the elbow test. Grip a pole with the tip on the floor and your hand on top of the grip. Your elbow should bend at roughly 90 degrees and your forearm should sit level. If your elbow is tighter than 90 degrees, lengthen the pole 2–3 cm; if your shoulder lifts, shorten it.
-
Adjust for terrain as you walk. Shorten the poles 5–10 cm for steep uphill so you can push down in front of you, and lengthen them 5–10 cm for steep downhill so they reach the ground ahead of your feet. Tip: Check the lock after each adjustment by pressing down hard on the grip. A pole that slips under your weight can collapse mid-stride, and that’s how wrists get sprained on descents.
-
Mark your settings. Once you find your flat-ground length and your downhill length, remember or photograph the numbers. You’ll skip the trial and error on every future hike.
If a pole’s lock won’t hold at your length even when tightened, stop using it on steep ground and take it to the retailer or manufacturer for a warranty check — a collapsing pole is a real fall risk on a downhill.
Time it takes to get the length right
Sizing poles is quick at home but takes a few outings to truly dial in, because your ideal length shifts with terrain and how tired you are.
| Situation | How long | What changes it | What to watch for |
|---|---|---|---|
| Setting length at home | 5–10 minutes | Adjustable vs. twist-lock poles (twist locks are slower) | Both poles set to the same number |
| First hike with new poles | 1–2 hours of walking | Terrain — stop to adjust more on rolling trails | Sore wrists or raised shoulders |
| Dialing in uphill/downhill settings | 2–3 hikes | How steep your usual trails are | Pole tip reaching the ground ahead of you on descents |
| Switching to a loaded pack | A few minutes to re-set | Pack weight shortens your stride slightly | Hunching forward at the shoulders |
If your shoulders or wrists still ache after three decent hikes, your length is probably off by more than a few centimeters — go back to the elbow test rather than pushing through.
Signs your pole length is right
You can check the fit in about ten seconds, and your body confirms it over the first hour of walking. Stand with a pole planted and look at your elbow: it should bend at about 90 degrees with your forearm level to the floor. That’s the standard fit test that most pole makers publish in their sizing guidance — the same 90-degree rule appears across manufacturers’ charts, and REI’s trekking pole advice describes it as well.
On the trail, three signs confirm it. Your pole tips strike the ground beside your feet in a natural rhythm without you reaching forward or dragging behind. Your shoulders stay low and relaxed. And your wrists stay straight rather than bent up or down over the grip.
When two of these say one thing and the elbow test says another, trust the elbow test — it’s the measurable one. If your elbows are right but your shoulders still ache, the problem is usually grip habit or strap use, not length.
Pole length mistakes to avoid
- Buying by feel instead of the formula. Poles that “look about right” in the shop are often 5–10 cm off, and you won’t notice until an hour into a hike when your shoulders burn. Do the height × 0.66 sum before you shop, then verify with the elbow test.
- Setting both poles from the same marking without checking. Twist-lock poles in particular can settle between markings, so one pole ends up 2–3 cm longer than the other. Line the two poles up side by side before every hike.
- Leaving poles at one length for the whole hike. A flat-ground setting is too long for a steep climb and too short for a steep descent, which costs you balance exactly when you need it. Adjust 5–10 cm at each big terrain change.
- Ignoring the minimum and maximum marks. Extending an adjustable pole past its “STOP” or “MAX” line leaves too little overlap between sections, and the pole can buckle under your weight. If your target length exceeds the pole’s range, the poles are the wrong size for you, not badly adjusted.
- Sizing by shoe height instead of full height. People sometimes eyeball the right length standing in socks on a store floor. Measure your real standing height in the shoes you hike in — a thick sole changes the floor-to-hand distance.
Related guides
- Best Time To Go To Dolomites For Hiking
- What Size Reel Is Best for Trout Fishing?
- 5 Best Day Hiking Backpack for Petite Female
Frequently asked questions
How tall should you be for 120 cm hiking poles?
Roughly 180 cm, or about 5’11”. Run 120 × (your height ÷ 180) as a quick check, or just use height × 0.66. If you’re between 175 and 185 cm, 120 cm poles will fit your flat-ground stride.
What length hiking poles do I need for downhill hiking?
Add 5–10 cm to your flat-ground length for descents. The pole needs to plant ahead of your lead foot, and on a slope that means reaching lower ground than your feet. Adjustable poles handle this; fixed-length poles force you to grip lower on the shaft instead.
Can hiking poles be too long?
Yes, and you’ll feel it in your shoulders within an hour. Poles more than about 5 cm past your elbow-test length push your shoulders up and bend your wrists back, which turns the poles from load-sharers into arm weights. Shorten until your forearm sits level.
Is it safe to extend poles past the MAX line?
No. The MAX or STOP mark is the manufacturer’s limit on how far the sections can separate while still holding your weight. Past that line, the overlap is too small and the pole can bend or collapse under load. If you need more length than the pole allows, you need a longer model.
What happens if my poles are uneven lengths?
Your rhythm and balance go off, and one shoulder does more work than the other. Because each pole takes a share of your weight on every stride, even a 3 cm difference adds up over a few hours. Line them up side by side and match the numbers before you set off.
How do I size poles for a child?
Use the same rule — height × 0.66 — which for a 130 cm child gives about 85 cm. Many adult adjustable poles don’t shorten that far, so check the minimum mark on the pole before buying. Kids’ models usually start around 60–70 cm.
Do trail running poles use the same sizing?
Yes, the height × 0.66 rule holds, but trail runners often set poles 2–3 cm shorter for a more compact carry and quicker pole swaps. If you’ll stow the poles in a vest most of the run, check the collapsed length matters more to you than a centimeter of reach.
Conclusion
The formula gets you close on day one, and your elbows and shoulders tell you the rest. Set both poles by the numbers, do the 90-degree check before you leave the house, and adjust 5–10 cm when the trail tilts — after two or three hikes, the right length will feel automatic.