Are your golf clubs just a bit too long, making your swing feel awkward and out of control? You’re not alone.
Many golfers find that standard-length clubs don’t quite fit their height or playing style, leading to less accuracy and more frustration on the course. The good news? You can shorten your golf clubs yourself and gain better control, improved comfort, and a more consistent swing.
In this guide, you’ll learn simple, step-by-step methods to cut down your clubs at home safely and effectively. Ready to make your game smoother and more enjoyable? Let’s dive into how to shorten golf clubs the right way.
Reasons To Shorten Clubs
Shortening golf clubs can make a big difference in your play. Many golfers find that adjusting the club length improves comfort and performance. There are clear reasons why you might want to shorten your clubs. These reasons range from better control to fitting your body size. Some even shorten clubs to give old equipment a new life. Understanding these reasons helps you decide if shortening clubs is right for you.
Improve Swing Control
Shorter clubs give better control during your swing. The club feels lighter and easier to handle. This helps you keep the club on the right path. Better control can lead to more consistent shots. It also reduces the chance of slicing or hooking the ball. Shortening clubs helps many players improve their accuracy.
Fit For Shorter Players
Golfers with shorter arms or smaller stature need clubs that fit. Standard-length clubs can be hard to swing properly. Shortening the clubs makes them easier to use. It helps maintain the correct posture and stance. This fit reduces strain and improves comfort on the course. Properly sized clubs allow shorter players to play their best.
Repurpose Old Clubs
Old clubs may be too long or not suitable anymore. Instead of buying new clubs, you can shorten them. This gives the clubs a second life and saves money. It can also make clubs better suited for beginners or juniors. Repurposing old clubs is a smart and eco-friendly option. It keeps your gear useful and ready to play.
Tools Needed
Shortening golf clubs requires specific tools to ensure clean cuts and proper reassembly. Having the right equipment makes the process safer and more accurate. Prepare these tools before starting your project to work efficiently and avoid damage.
Utility Knife
A utility knife helps remove the old grip from the club. Cut carefully along the grip’s edge. Peel off the grip tape underneath to reveal the shaft. This step is crucial for a clean cut and proper re-gripping later.
Hacksaw Or Tubing Cutter
Use a hacksaw or tubing cutter to shorten the shaft. A hacksaw is easy to find and works well. A tubing cutter provides a cleaner, straighter cut. Choose the tool that fits your comfort and the shaft material.
Sandpaper
Sandpaper smooths the cut end of the shaft. It removes any rough or sharp edges. This prevents damage to the new grip and improves fit. Use fine-grit sandpaper for the best finish.
Grip Tape And Solvent
Grip tape and solvent secure the new grip to the shaft. Wrap the grip tape tightly around the shaft’s end. Spray the solvent to make the tape sticky and easy to slide the grip on. This step ensures the grip stays firmly in place.
Removing The Grip
Removing the grip is the first step when shortening golf clubs. It allows you to access the shaft for cutting and adjusting. This process requires care to avoid damaging the shaft. Start by handling the grip carefully and prepare the tools needed for removal. Proper grip removal makes the rest of the process easier and cleaner.
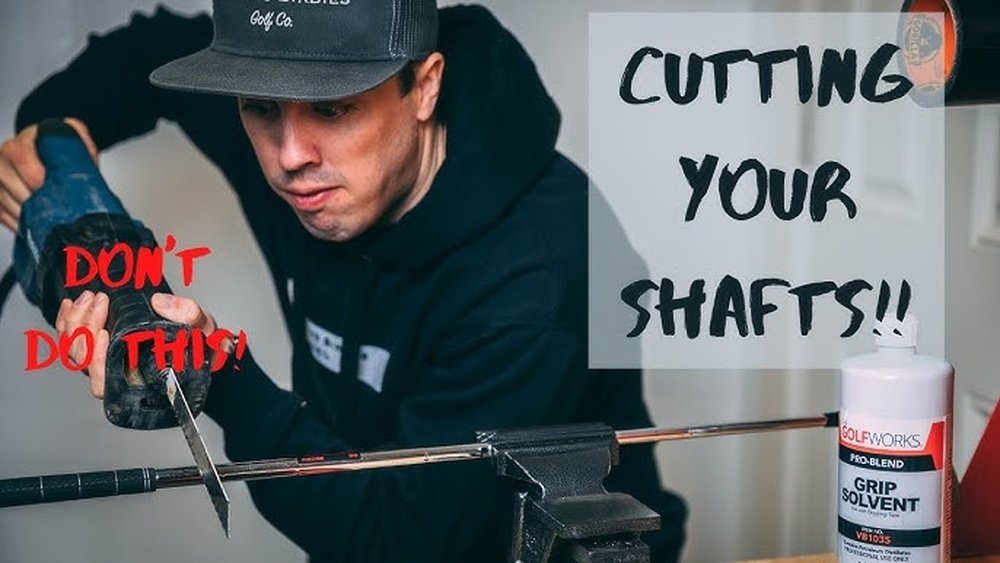
Cutting Off Old Grip
Use a sharp utility knife to cut off the old grip. Place the blade along the length of the grip. Apply gentle pressure and slice through the rubber or synthetic material. Take your time to avoid cutting into the shaft. Once cut, peel the grip off the shaft by hand. This step frees the shaft for further work.
Peeling Off Tape
Underneath the grip, you will find grip tape wrapped around the shaft. Peel this tape off slowly and carefully. Use a plastic scraper or your fingernail to lift the tape edge. Remove all tape residue to ensure a smooth surface. Clean the shaft with a cloth to remove any leftover adhesive. This prepares the shaft for measuring and cutting.

Credit: www.youtube.com
Measuring And Marking
Measuring and marking golf clubs accurately is crucial before shortening them. This step ensures the final length fits your style and comfort perfectly. Careful measurement avoids mistakes that affect your game. Marking the shaft clearly guides the cutting process. Take your time and be precise.
Determine Desired Length
First, decide how much shorter the club should be. Measure from the top of the shaft down to the new length. Use a tape measure or ruler for accuracy. Check the recommended length for your height and swing style. Write down the measurement. Double-check it before moving on. Consistency matters for every club you modify.
Mark Cutting Line
Next, mark the shaft at the exact length chosen. Use a fine-tip marker or pencil. Draw a clear, straight line around the shaft. This line shows where to cut. Avoid thick or uneven marks that can cause errors. Make the mark visible under different lighting. Keep the club steady while marking to ensure precision. This step sets the foundation for a clean cut.
Cutting The Shaft
Cutting the shaft is a key step in shortening golf clubs. It requires precision and the right tools to avoid damaging the club. A clean, straight cut ensures the club maintains its performance and feel. Proper technique helps keep the shaft strong and ready for regripping.
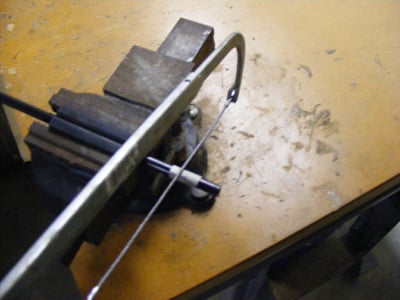
Using A Hacksaw
A hacksaw is a common tool for cutting golf shafts. Use a fine-toothed blade for better control. Secure the shaft firmly in a clamp before cutting. Saw slowly and steadily along the marked line. Avoid forcing the blade to prevent splintering the shaft.
Using A Tubing Cutter
A tubing cutter offers a cleaner cut than a hacksaw. Place the cutter around the shaft at the mark. Tighten the cutter slowly while rotating it around the shaft. Continue tightening and rotating until the shaft breaks cleanly. This method reduces the risk of jagged edges.
Ensuring A Clean Cut
After cutting, check the shaft end for roughness. Use fine sandpaper to smooth any sharp edges. Remove metal or carbon dust carefully to avoid damage. A smooth cut end helps the new grip fit snugly. It also prevents damage to the grip over time.
Smoothing The Shaft End
Smoothing the shaft end is a crucial step after cutting down a golf club. It removes sharp edges and prevents damage to the grip. A smooth shaft end also helps the grip fit snugly and securely. Taking time to smooth the cut ensures better club performance and durability.
Sanding Techniques
Start with medium-grit sandpaper to level the cut edge. Wrap the sandpaper around the shaft end and rub evenly. This removes burrs and rough spots. Then switch to fine-grit sandpaper for a smooth finish. Sand in a circular motion to avoid flat spots. Check frequently to avoid over-sanding. The goal is a clean, smooth surface without sharp edges.
Preparing For Re-grip
Before installing the new grip, clean the shaft end thoroughly. Remove dust and sanding residue with a cloth. Apply grip tape evenly around the shaft end. Make sure the tape covers the entire sanding area. Spray grip solvent over the tape to help the grip slide on easily. Let the solvent soak for a few seconds. Then slide the new grip onto the shaft. The smooth end and fresh tape ensure a tight, secure fit.
Re-gripping The Club
Re-gripping the club is a key step after shortening golf clubs. It ensures the club feels comfortable and secure in your hands. A proper grip improves control and accuracy during your swing. The process involves removing the old grip and applying a new one with fresh grip tape. This section explains how to apply grip tape and install a new grip correctly.
Applying Grip Tape
Start by cleaning the shaft to remove any old tape or residue. Wrap new grip tape tightly around the shaft, covering the area where the grip will sit. Overlap the tape slightly to avoid gaps. Make sure the tape is smooth with no wrinkles. This helps the grip stick well and last longer. Trim any extra tape at the ends for a neat finish.
Installing New Grip
Spray grip solvent inside the new grip and on the taped area. Quickly slide the grip onto the shaft while the solvent is wet. Twist the grip gently to spread the solvent evenly inside. Align the grip so the logo or seam is in the correct position. Hold the grip in place for a few minutes to let it dry. The grip should feel firm and not slip during use.
Effects Of Shortening
Shortening golf clubs changes how they perform and feel during play. These changes affect your swing, control, and comfort. Understanding these effects helps you decide if shortening suits your needs.
Increased Shaft Stiffness
Cutting the shaft makes it shorter and stiffer. A stiffer shaft bends less during the swing. This can improve accuracy for some players. However, it may reduce feel for others. Stiffness change depends on how much you shorten the club.
Lower Swing Weight
Shorter clubs weigh less at the swing point. This lowers the swing weight and changes the balance. The club may feel lighter and faster to swing. Some golfers like this for better control. Others may miss the heavier feel of the original club.
Changing Lie Angle
Shortening a club changes its lie angle slightly. The lie angle is the angle between the shaft and the ground. A higher or lower lie angle affects how the clubhead contacts the ball. Adjusting the lie angle may be needed after shortening.
Loft Remains Unchanged
The loft angle stays the same after shortening. Loft controls the height and spin of the ball. Shortening does not affect ball flight caused by loft. You keep the same launch and spin characteristics.
Adjusting Swing Weight
Adjusting the swing weight is a key step after shortening golf clubs. Swing weight affects how heavy the club feels during a swing. Changing the length of the club usually lowers the swing weight. This can make the club feel too light or unbalanced. Properly adjusting the swing weight keeps the club comfortable and effective for your swing.
Adding Lead Tape
Adding lead tape is a simple way to increase swing weight. Apply small strips of lead tape to the clubhead. This adds weight exactly where it is needed. Start with a little tape and test the feel. Add more tape if the club still feels too light. Lead tape is easy to remove and adjust.
Balancing The Club
Balancing the club means making sure the weight feels right from grip to head. Check the club’s balance by holding it at the midpoint. The club should not tip too much to either end. Adjust weight by moving lead tape or changing the grip weight. A balanced club improves control and consistency in your swing.

Credit: golfhireireland.com
Tips For Best Results
Shortening golf clubs requires care and precision to maintain performance. Follow these tips for the best results. Taking your time and using the right methods ensures safer and more effective adjustments. A small mistake can affect your swing and comfort.
Use simple steps and focus on accuracy. This helps keep your clubs balanced and comfortable to use. You can do this at home with the right tools, or ask for expert help if unsure.
Measure Twice, Cut Once
Measure the club length carefully before cutting. Use a tape measure or ruler to mark the exact spot. Double-check your marks to avoid cutting too short. Mistakes here are hard to fix. A small error can change the feel and performance of the club.
Use Proper Tools
Use tools made for cutting metal or golf shafts. A hacksaw or tubing cutter works well. Avoid tools that can damage the shaft. After cutting, smooth the edges with sandpaper. This step prevents injury and protects the club from damage.
Consider Professional Help
Seek help from a golf shop or club fitter if unsure. Professionals have the right tools and experience. They can adjust your clubs without harming them. This option saves time and reduces the risk of errors. It also ensures the club is properly balanced after cutting.
Common Mistakes To Avoid
Shortening golf clubs can improve your swing and comfort. Avoid common mistakes to get the best results. These errors can hurt your club’s performance. Learning what not to do saves time and money.
Cutting Too Much
Cutting too much off the shaft weakens the club. It changes the balance and feel too much. Your swing speed and accuracy may suffer. Measure carefully before cutting. Start with small cuts and test often.
Ignoring Lie Angle Changes
Shortening affects the lie angle of the club. The clubhead may tilt too much up or down. This causes poor contact with the ball. Adjust the lie angle after cutting. Use a lie board or get help from a pro.
Poor Grip Installation
Removing and reinstalling the grip needs attention. Old grip tape must be cleaned off completely. New tape should be applied evenly. A crooked or loose grip can affect control. Take your time to install the grip properly.
Credit: www.hirekogolf.com
Frequently Asked Questions
Can You Make Golf Clubs Shorter?
Yes, you can shorten golf clubs by cutting the shaft using proper tools or professional help. This makes the shaft stiffer, reduces swing weight, and alters the lie angle. Shorter clubs improve control and suit shorter or junior players. Always re-grip and adjust the lie angle after cutting.
What If My Golf Clubs Are Too Long?
Too-long golf clubs can hinder your swing and control. Shorten shafts by cutting, then re-grip and adjust the lie angle for better fit and performance.
How Much Does It Cost To Shorten A Set Of Golf Clubs?
Shortening a set of golf clubs typically costs between $10 and $30 per club. Professional fitting and adjustments may increase the price. DIY shortening only requires basic tools, saving money but demands precision for best results.
What Is The 70/30 Rule In Golf?
The 70/30 rule in golf suggests golfers use 70% irons and 30% woods in their bag. This balance improves versatility and performance.
Conclusion
Shortening golf clubs can improve your swing and control. Always measure carefully before cutting. Use the right tools for a clean, safe cut. Remember to smooth the shaft and re-grip properly. Adjust the lie angle after shortening for best results.
This process helps clubs fit your height and style better. Take your time and follow each step closely. This simple change can make your golf experience more comfortable. Practice with your newly shortened clubs to get used to them. Your game may feel more natural and confident on the course.